Creo Elements/Direct is a product family for creating and adapting mechanical designs through direct modeling, with companion tools for drawings and design data. It can support one-off work, reused geometry and changing assembly requirements.
Start with the shape that needs to change.
A one-off product or a reused assembly often begins with a specific geometric question. Make the proposed change understandable, preserve the reference you started from, and decide which drawings and shared records must follow it.
Start with the work that needs to move: a product variation, a drawing update or a shared assembly. Choose the authoring and management tools together so the proposed geometry, its documentation and the reference used by the team remain understandable.
Select the relevant geometry
Explore the proposed change
Review the resulting definition
Three complementary responsibilities
Three product roles. One connected design workflow.
Choose the product role first. The detailed sections below explain authoring, documentation and management without treating them as interchangeable tools.
Direct modeling. Turn a change into a working design.
Develop a new mechanical design or reshape an existing assembly without requiring the same feature-history approach as a parametric workflow. Direct interaction with geometry makes the proposed change the center of the design discussion.
Bring suitable supplier or partner CAD data into the model, then review the geometry and required downstream outputs. Confirm translator and release support for the files involved; importing a shape is different from preserving every source-system relationship.
A practical evaluation
A mounting change, considered in context.
Use a representative assembly to examine a proposed mounting change. Keep the neighboring parts and required outputs in view: a shape that looks acceptable alone may need further review when it returns to its product context.
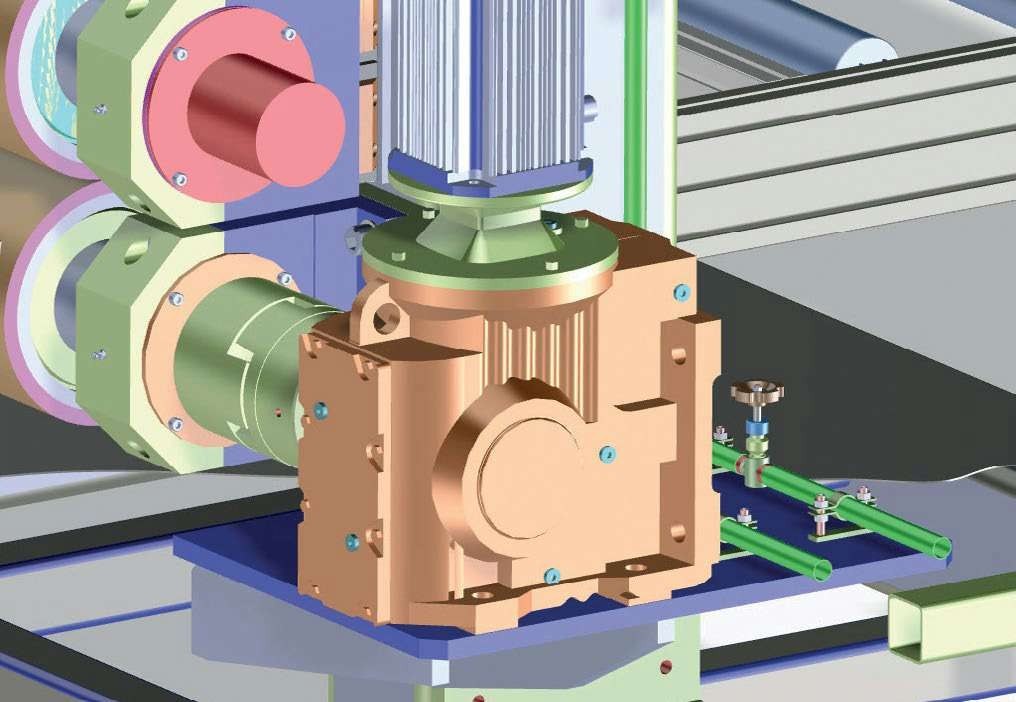
Mechanical assembly illustration from the Machine Productivity Package datasheet.
Parts and assemblies
Work on the geometry in the context needed to understand the product.
Reuse and change
Keep an understandable starting reference when exploring an alternative.
Digital prototype
Check the relevant fit and handoff before treating a proposal as a released definition.
Scope specialist work deliberately
Specialist extensions. Build around the engineering task.
Start with the work your team needs to finish: route a harness, prepare a part for fabrication, check a design under load, or share a model for review. Use the examples below to identify which tools to evaluate. Confirm release availability and licensing before including them in your plan.
Develop the geometry
Choose by what you need to create: a harness, a formed part, a mold assembly, or a freeform surface.
Cabling
Route a harness inside the mechanical assembly, then prepare the cable drawings, parts list, or nail board layout the wiring team needs.
Planning context+
Use a representative enclosure to check connector access and routing space before reviewing the harness documentation with manufacturing.
Sheet Metal
Develop a formed part, such as an enclosure cover, and check the flat blank that will be cut before bending.
Planning context+
Verify thickness, bend allowances, and available tooling with the shop before relying on the flat pattern for fabrication.
Mold Base
Build out the mold plates and standard components that surround a molded part, using a workflow designed for tooling.
Planning context+
Confirm the mold base standard with the toolmaker and agree on which components must be modeled for the tooling review.
Surfacing
Shape freeform geometry, such as the curved outer skin of a housing, where transitions between surfaces matter.
Planning context+
Agree on how smooth adjoining surfaces need to be and who will check them before the geometry goes to detailing or tooling.
Investigate the design
Separate manufacturing checks from performance studies so each review answers a specific engineering question.
Advanced Design
Use the Advanced Design modules to investigate potential manufacturing issues while the design is still a digital prototype.
Planning context+
Bring a part with a known production concern. Ask the team to identify which module would help assess it and what evidence would support a design change.
Finite Element Analysis
Evaluate how a part responds under a defined load. For example, compare how two versions of a mounting bracket deflect under the same assumptions.
Planning context+
Record the material, load, and constraints so another engineer can judge whether the results reflect how the bracket will actually be installed.
Simulate and Advanced Simulate
These Creo Parametric extensions are a separate option for teams that need to investigate behavior such as nonlinear response.
Planning context+
They are separate from native Elements/Direct modules. If you need to pass a model to an analyst, verify how geometry transfers and what must be set up again in the study.
Reuse and communicate
Tools around standard components and the review audience.
Part Library
Start with standard hardware from the library, such as bolts, nuts, and washers, when detailing a joint.
Planning context+
Check that the library includes the sizes and standards your team specifies, then match the chosen hardware to approved purchasing records.
3D Access
Give reviewers a way to inspect a 3D assembly or its 2D design information without editing the original model.
Planning context+
Try a supplier review with the actual files you expect to share. Confirm which formats the reviewer can open and what they are allowed to receive.
AR Design Share
PTC lists AR Design Share as a way to review a design in augmented reality, for example to discuss how an enclosure might fit in its intended space.
Planning context+
Before planning an AR review, confirm service availability, access for external participants, and supported devices.
Create and maintain mechanical 2D designs using a part, assembly and subassembly structure. Drafting provides a dedicated environment for working through layouts and detailed drawings rather than treating every drawing as an unstructured collection of layers.
Use the drawing to communicate the definition needed by its audience. Agree the exchange format, revision reference and required checks when reusing legacy drawings or collaborating across CAD systems.
Conceptual drawing views and assembly structure; not a product screenshot.
2D Access
Give reviewers a viewing and inspection route when they do not need the authoring application.
Drawing Manager
Coordinate drawing files and related data through the dedicated management companion; confirm configuration and access responsibilities.
Keep drafting distinct from early concept arrangement.
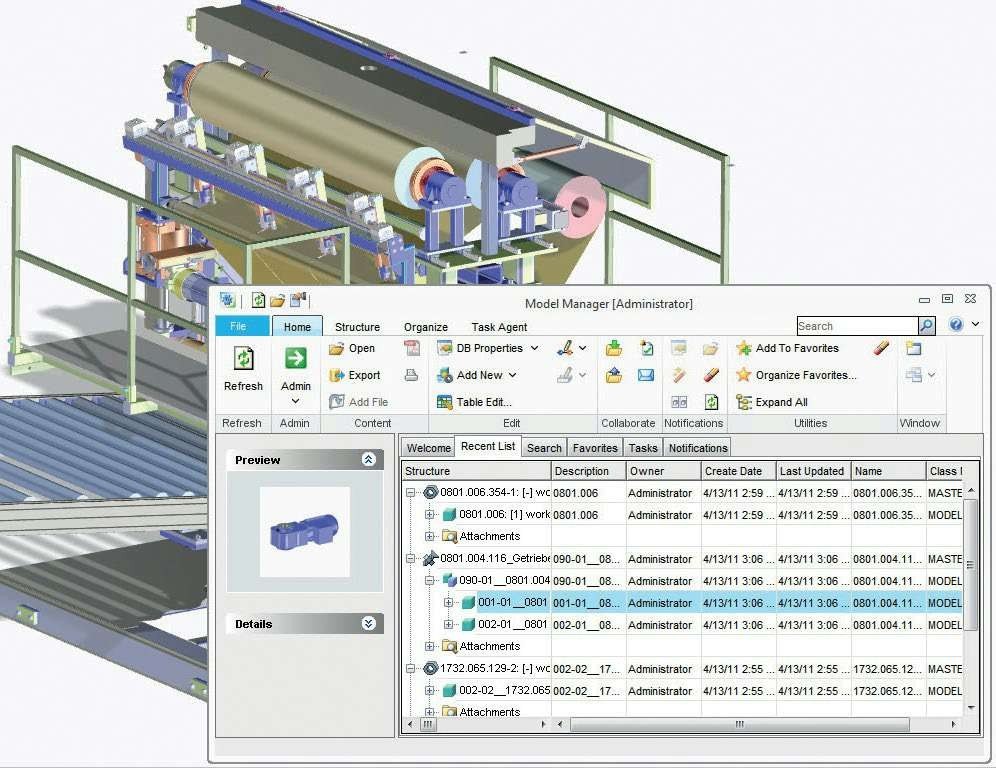
Bring design-data management into the Modeling environment. A central workgroup database helps the team coordinate the product information behind an assembly instead of relying on personal folders and informal file naming alone.
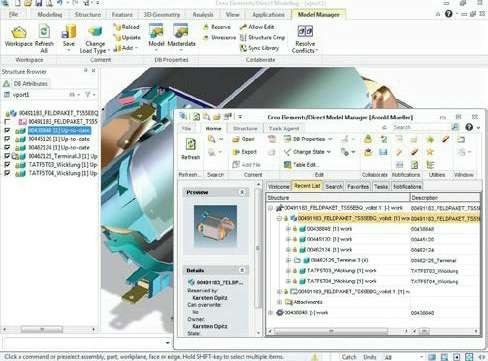
Model Manager interface example from its product datasheet; current appearance may differ.
The handoff reference
A design record that can travel with the work.
Before handing an assembly to another person, identify the record they should use and the responsibility they are taking on. Ownership, revision and state provide different pieces of that context; none replaces your organization’s review or release decision.
Define how the team will work with ownership, revision and design state. A managed record supports coordination, while the organization still owns its approval process, permissions and connections to other business systems.
Which version of the design record should be referenced?
Design state
Is the record in work, under review or ready for its intended use?
A reduced edition for getting started
Modeling Express. Understand the free edition.
PTC offers Creo Elements/Direct Modeling Express as a free, reduced edition, with a limit of 60 unique parts in a design session. It is a different scope from professional Modeling and its productivity modules.
Modeling Express60unique parts in a design session
Choose the edition around the intended outcome.
Use a bounded learning or evaluation task to decide whether the reduced edition is appropriate. If the work must become a professional design deliverable, settle the file and licensing route before creating information that another team needs to use.
Prepare for access and exchange
Individual registration and a PTC account are required for activation.
Review the current Windows, connectivity and licensing requirements before installation.
Check the required import/export and file-sharing workflow before investing in a model.
The published Express FAQ describes PK2 files as incompatible with professional Modeling. Its comparison and FAQ are background documents dated 2020; verify current edition behavior before planning a handoff.
The software download follows PTC’s account, activation and license-term process. TriStar can help clarify access and whether Express fits your intended use.
Your work, your toolset. Find a productivity package.
Use the published package datasheets to frame a capability discussion. Confirm current module availability, licensing and the proposed configuration rather than assuming a package name guarantees a specific environment.
Sheet Metal Productivity Package
A package focused on sheet-metal design, pairing Modeling with Sheet Metal and Model Manager in the published datasheet.
Which bends, tooling rules and managed outputs does your sheet-metal workflow require?
Different industries. Design with the handoff in view.
Consider the geometry, drawing and managed-reference needs together in your industry.
Scroll or swipe to explore all 5 industries. Use Tab to reach each industry link.
Aerospace & Defense
Coordinate mechanical design exploration with the program’s definition, review and configuration responsibilities. Elements/Direct in context Which design record and review responsibilities must stay connected?
Vehicle programs coordinate components across packaging, supplier and manufacturing constraints. Use this setting as a practical example when directly editing mechanical geometry and managing design revisions. Which product interface and review criteria should guide the evaluation?
Develop equipment variations around parts and assemblies, with specialist tooling and managed design records where required. Elements/Direct in context Which equipment variation should the team use to evaluate the workflow?
Develop enclosure and equipment geometry while keeping drawing and design-record handoffs clear. Elements/Direct in context Which enclosure or mounting change needs a coordinated model and drawing?
Device teams work within defined design controls and documented review responsibilities. Use this setting as a practical example when directly editing mechanical geometry and managing design revisions. Which product interface and review criteria should guide the evaluation?
Choose with clarity. Your Elements/Direct questions, answered.
Clarify product names, edition limits and workflow scope before making the next decision.
Is Creo Elements/Direct the same product as Creo Direct?+
No. They are distinct product names. This page covers the Elements/Direct family. Identify the exact installed application, version and required workflow when discussing compatibility or licensing.
How do Modeling, Drafting and Model Manager differ?+
Modeling authors direct 3D geometry; Drafting is a dedicated 2D CAD environment; Model Manager coordinates design data alongside Modeling. Choose around the responsibility, and confirm the applicable integrations.
Are all listed extensions included?+
Do not assume so. Specialist modules, related products and services can have separate licensing or release requirements. Use the datasheets as a discussion guide and confirm the proposed scope.
What should we check before importing supplier CAD data?+
Confirm the translator, source format and version, geometry quality and required output. Inspect the imported result and agree how the resulting definition will be reviewed and controlled.
What is the limit in Modeling Express?+
PTC’s current source page lists 60 unique parts. Express is a reduced edition with registration and activation requirements; verify current system, exchange and licensing conditions before starting.
Can Express files move directly into professional Modeling?+
The published Express FAQ describes its PK2 format as incompatible with professional Modeling. Confirm current file behavior and the required exchange before planning a migration or sharing models across editions.
How should we choose a productivity package?+
Start with a representative product and the tasks the team must complete. Map the needed authoring, specialist modules and data-management responsibilities to a confirmed package configuration.
Your Elements/Direct discussion
Bring the design challenge. Plan your Elements/Direct workflow.
Tell us about your design changes, drawings and shared model information. TriStar can help scope the products, modules and data workflow around a representative engineering task.